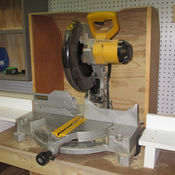
DeWALT Mitersaw
| DeWALT Mitersaw | |
|---|---|

| |
| Name | DeWALT Mitersaw |
| Zone | Wood Shop
|
| Owner | i3Detroit |
| Make Model | DeWALT DW 705 Type 6 |
| Part Number | S/N 14165 |
| Date Acquired | 2010 |
| Storage Location | This mitersaw is located at the south end of the wood shop. |
| Authorization Required | No |
| Status | Running |
| Value | 250
|
| Documentation | Media:Miter Saw Operating Manual.pdf |
| Other References | * Miter saw consumables are on this list: Wood Shop Consumables |
Intro
For sawing wood, plastics, or non-ferrous thin metals using a special blade.
Rules
- If making more than one or 2 cuts please start the Big Dust collector system
- Use with wood only, please!
- Eye and ear Protection are required when operating the miter saw
- Don't wear gloves, loose clothing, jewelry, or any dangling objects when operating a miter saw.
- All guards must be in place and operating. If a guard seems slow to return to its normal position or hangs up, adjust it or repair it immediately.
- Unplug or lockout power to the miter saw when making repairs or adjusting blades and guards
- Hands and fingers must be kept clear of the blade by at least 6 in.
- Clean the lower guard frequently to help visibility and movement.
- To avoid losing control or placing hands in the blade path, hold or clamp all material securely against the fence when cutting.
- Never cut small pieces.
- Long material should be supported at the same height as the saw table.
- To avoid contact with a coasting blade, do not reach into the cutting area until the blade comes to a full stop.
- After completing a cut, release the trigger switch and allow the blade to come to a complete stop, then raise the blade from the workpiece. If the moving blade stays in the cutting area after the cutting is complete, injury can result from accidental contact.
Instructions
- Lift the blade guard with your thumb and sight down one edge of the blade to align your cut. Caution: Remove your fingers from the switch while you're aligning the cut. Firmly hold or clamp the workpiece. Then gradually release the blade guard and return your hand to the switch to make your cut.
- A power miter saw is one of the best tools to cut tight-fitting joints on all kinds of moldings: window and door trim, baseboard and crowns. With a power miter saw and a sharp saw blade, it's easy to fine-tune a joint for a perfect fit by slightly adjusting the angle or trimming off a hair's width.
- Be prepared for a startling experience the first time you squeeze the switch on a power miter saw. The saw will jerk and whine as the blade gets up to speed. Listen for the blade to reach top speed before starting your cut. Then lower the blade slowly and steadily through the board until the cut is complete. Hold the saw carriage down in this position and release the switch, allowing the blade to come to a complete stop before raising it. Maintain a firm grip on the workpiece until the blade stops spinning.
- Aligning the blade with the cutting mark on your workpiece gets easier with practice. Cut a little beyond the line, leaving extra length on your workpiece. Test the fit Then slice off a little more. Keep a firm grip on the workpiece (with your hand a good 6 in. away from the blade) to prevent it from being pushed aside by the blade. For greater accuracy, clamp the workpiece.
- Cutting short pieces requires special techniques
- Whenever you have to cut miters on a piece less than about 8 in. long, cut them from a longer piece so you can keep your fingers in the safe zone away from the blade. If you need a 6-in. piece of baseboard with miters on both ends, for example, cut one miter on the end of a long piece of base. Then mark for the other miter, change the miter saw angle, and cut off the 6-in. piece while you hold the longer end. Very small pieces fall through the large gap in the fence on many saws and can easily break or be flung across the room. Sometimes it's helpful to attach a taller wood fence to your miter saw to support wide trim and reduce the size of the space near the blade.
Maintenance Info
- Sharpening the blade costs about $30 and rebrazing tips on the blade $8 to $10 a tooth.
- Blade Changing -- there is a Non-Ferris blade available for the Miter saw, when changing the blade, use a T30 Torx bit to loosen (not remove) the screw that hold the shroud in place, slightly move the shroud back allowing access to the 1/2 inch hex bolt that holds the blade in (remember this is a left handed bolt).
Be sure and reinstall the wood cutting blade after use.
- If you think the blade is dull please advise the wood shop Coordinator
FAQ
ToDo