HOWTO Execute An Embroidery on the Husqvarna Designer SE
This page details how to use the Husqvarna Designer SE to execute an existing embroidery--either one you've created yourself (using the instructions here), or one which already exists in the libraries on the machine.
This page is for reference only. The Husqvarna requires training and authorization.
Procedure
Whether you're executing your own design or one in the machine, the steps are similar:
1. Turn on the machine, as in HOWTO Baste Fabric Using the Husqvarna Designer SE.
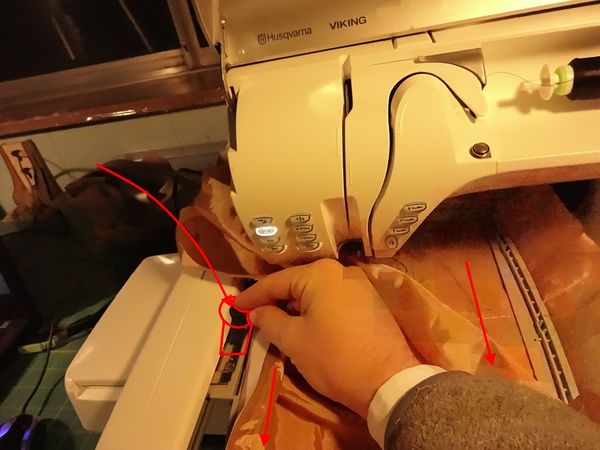
2. Follow any on-screen prompts for preparing the machine. If instructed to remove the embroidery hoop, locate the press button using the following photos. Press it down, then pull the hoop towards you.
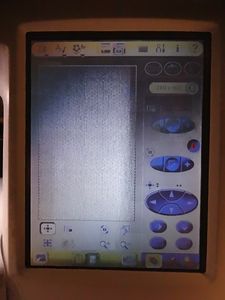
3. You should be defaulted to the new embroidery screen. If not, put the machine into embroidery mode: In the top bar on the touch screen, select the rightmost of two icons which look like sewing machines. The screen should look like the following.
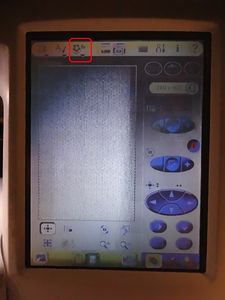
You'll now need to select an embroidery to execute. As noted above, it's most common to execute a design you've created yourself. However, the Husqvarna comes with a sizeable library of embroideries built in. To access either, find the flower icon in the top bar of the touchscreen.
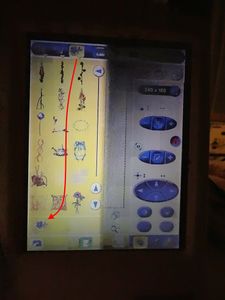
Press it to get a menu of embroideries already available on the machine.
To import your own embroidery, either save your .vp3 on a USB drive and insert at the right side of the machine, or connect the machine to your computer using the USB A-to-B cable stored near the machine. Then open the embroidery menu and navigate to the flower icon at the bottom of the menu.
This will give you a file selection utility. Navigate to your file.
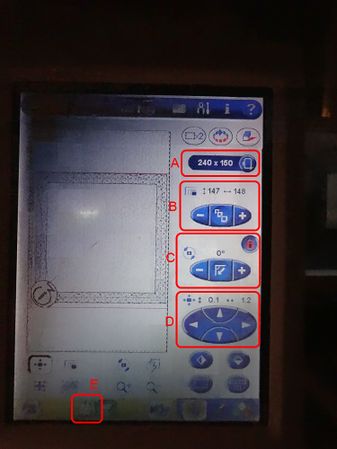
4. Once an embroidery has been selected, it will appear on the preview screen.
You can use this screen to:
A. Change the hoop size. The embroidery will sometimes default to a hoop you don't want; you can change that here.
B. Resize the embroidery. Remember to select the embroidery, by tapping it, before you attempt to resize it!
C. Change the angle of the embroidery.
D. Move the embroidery on-screen. Or tap the embroidery, then drag it.
Once you're finished getting the embroidery the way you want it in the frame, hoop up your fabric.
5. If you haven't already, you'll need to hoop up your material now!
5.1. Attach the material to a stabilizer.
- As a general rule, the lighter or stretchier the material, the more stabilizer you'll need. The Craft Room currently only stocks one weight, which has proven sufficient so far. If you're having trouble with your design, double the stabilizer (attach two sheets instead of one). For delicate or textured fabrics--silk, velvet, anything with a surface texture--use sticky stabilizer instead.
- Stabilizer is stored in the Roll Materials area, at the north-east corner of the room under the bench. It's a midweight paper, like dryer paper or rice paper--in fact, you may use any paper or cardboard which you think will give good results, but we do have paper which is especially designed for this task.
- You'll need to attach the paper to the fabric. (This step isn't necessary if you're using sticky stabilizer!) I recommend using basting, as documented in HOWTO Baste Fabric Using the Husqvarna Designer SE, but you can also pin it.
5.2. Hoop up the fabric/stabilizer sandwich, as described in HOWTO Hoop a Piece of Fabric for the Husqvarna Designer SE.
Find your hoop in the second drawer of the storage fixture under the Husqvarna.
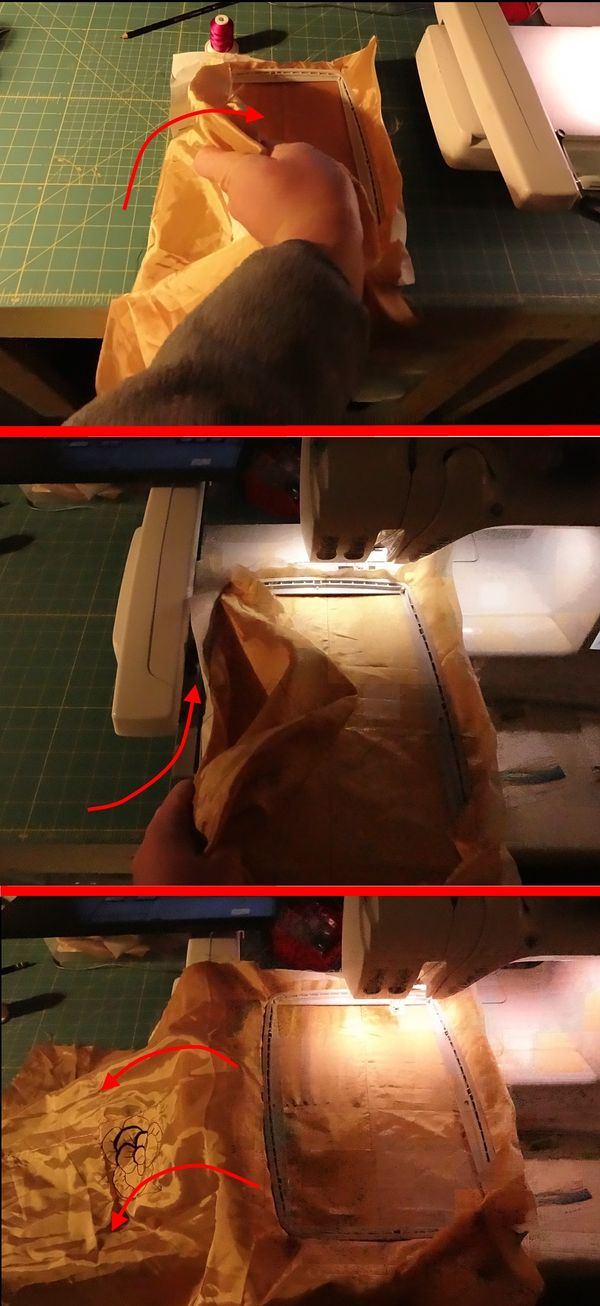
5.3. Place the hoop in the machine. Pull spare fabric to the left while you insert the hoop, then pull it back out so it looks like the following illustration.
6. Now, switch the machine to execution mode by pressing Button E from the embroidery preview screen, above.
There's no need to modify any of these settings. However, you may have to change the thread to match your first color: A. Look at the thread list on the left of the screen. B. If your thread isn't the one currently loaded into the bobbin, change it as per instructions on this Wiki.
Once you're ready, press the button labeled 'Start/Stop'. The machine will automatically begin to execute your embroidery.
During execution, the machine may:
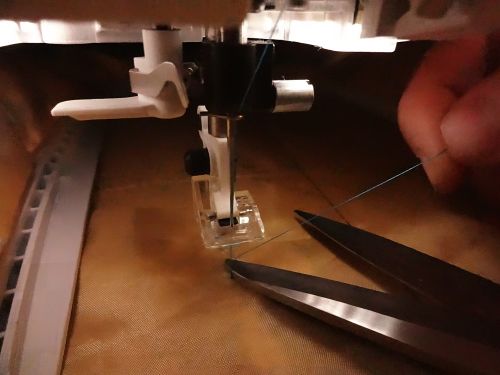
- Ask you to 'cut the thread. When this happens, you're being asked to remove loose threads from the surface of the embroidery. Do NOT cut the thread from the needle to the fabric!
- Ask you to change the thread color. Swap the thread as described in HOWTO Change the Thread on the Husqvarna Designer SE.
