HOWTO charge lead-acid batteries
Contents
Types of chargers
Types of batteries
- Flooded-cell: Common in cars, golf carts, etc. These have removable caps where *distilled* water can be added to the electrolyte. Modest overcharging won't hurt these, but simply shorten the watering interval. (Should be checked every 3-6 months.) You'll know it's a flooded cell if you tip it over and it spills acid everywhere, so don't do that!
- "Sealed", "Maintenance-free", Valve-regulated lead-acid (VRLA), Absorbed glass mat (AGM): Common in PC UPSs, alarm systems, mobility scooters. There's no such thing as a truly sealed or maintenance-free lead-acid battery, these are just maintenance-prohibited so they become useless when their electrolyte runs out of water. Overcharging hastens this. If the topside cap appears flush with the surface or difficult to pry out, assume it's this type.
- Gel-cell: Extremely rare, most people who say "gel-cell" are actually referring to AGM, above. Real gel batteries will say so on the label, and are very particular about charging.

When to charge
Charge early, charge often! Lead-acid batteries last longest if they're kept at 100% state-of-charge (SoC). They self-discharge while sitting idle, and need regular topping-off.
Never in an enclosed area. Hydrogen gas will be evolved according to the charge rate. Flooded cells will just vent it out, VRLA's will attempt to recombine it with an internal catalyst, but can only so so slowly. Regardless of type, anticipate venting and charge only in an area with fresh air. In practice, this means just don't charge in a closed box.
Before charging
If you don't know the battery to be healthy, measure its terminal voltage with a voltmeter. (Some chargers may have this built in.) If it's less than 10 volts, the battery is drained so far it's damaged, and recharging it may be dangerous. Consult an expert, but assume that it should be replaced.
Also, make really sure you're charging a 12-volt battery with a 12-volt charger. There are some 6-volt golf-cart batteries around, please don't blow them up!
On the subject of clamps
If charging a bare battery: Red to positive post, black to negative post. Stop the charger before connecting or disconnecting, to avoid sparking. (Sparks aren't just a source of ignition, they also produce voltage spikes that can damage the charger.)
If charging a battery in a car: Red to positive post, black to engine block or body metal. Stop the charger before connecting or disconnecting.
How to charge with a dumb charger
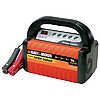
Identification of "Dumb" chargers: Little more than a transformer in a box, these hopefully have an ammeter, and most have a switch for current selection. Appropriate for charging of batteries known to be discharged, but not for trickle charging. Some have a mechanical timer, but these are prone to failure. Don't leave one unsupervised!
- Find the battery capacity. The label might have an Amp-Hour (AH) rating on it. If not, estimate: Rule of thumb: For 12-volt lead-acid batteries, a pound of weight is about 1AH of capacity. So a 60-lb car battery can be assumed to have about 60AH of capacity.
- Guess the depth of discharge (100 minus the SoC). Multiply by the capacity. So, a car battery at 75% SoC is 25% DoD * 60AH = 15AH to put back in.
- Set the charge rate. If the charger has multiple charge rates, (2A / 10A / 50A is common), pick the gentlest one that fits within your timeframe. Using the above example, putting 15AH back into the battery at 2A it would take 7.5 hours. Or at 10A would take 1.5 hours, but that would be rougher on the battery.
- Connect the battery. Red to positive, black to negative.
- Set the charger's timer, if it has one, to cut off the charge after the estimated period. NEVER USE THE ALWAYS-ON SETTING, this destroys batteries!
- Set an alarm in your phone to come back around that time, and kill the charger even if the timer fails to do so. Battery fires are no fun, please don't skip this step.
How to charge with a smart charger
Identification of "smart" chargers: Microprocessor-controlled, usually have a digital meter and pushbuttons for battery type and charging current. These can be left connected to a battery and will cut themselves off or switch to trickle mode when appropriate, BUT ONLY IF CONFIGRED CORRECTLY. When in doubt, disconnect before leaving.
- Connect the battery. This will wake up the charger, and it'll usually show the battery's resting voltage on the display.
- Determine the battery type. This might be obvious (caps = flooded, etc), might be printed on the label, or you might have to look up the part number online. Set the charger (usually with pushbuttons) for the appropriate type.
- Set the charge rate (amps).
- For charging a discharged battery: Unless you need the battery charged in a hurry, just use the gentlest one available. Again, push buttons until the right rate is lit. Most smart chargers will fire up as soon as you have both a type and rate configured, and the display will change to indicate current. Or, manually select the ammeter function. Observe that the battery is accepting current close to the selected charge rate. Switch to voltmeter mode and observe that the voltage is rising quickly at first, then much more slowly.
- For maintaining a car battery while running the radio and stuff indoors: Go ahead and use a high current (25A is typical), so the charger can keep up with the electrical loads in the car. It'll be un-gentle to the battery, but not as bad as letting it discharge from inadequate charger oomph.
How to use a trickle charger or maintainer
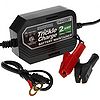
Identification of "Trickle" chargers: Usually very compact with only an LED or two for status indication, thin leads, and no switches. These are active the entire time they're connected, but they put out so little current, they won't dry out the battery. Designed to counteract the battery's self-discharge, a trickle charger is not useful for recharging a discharged battery.
- For a fixed-current trickle charger, make sure the rate is less than 1/20th of the battery's capacity, so don't use a 2A trickle charger on a battery smaller than 40AH. A ratio of 1/100th is safer. Yes, this means that most UPS-style VRLAs are too small to be used with common trickle chargers, so don't!
- For a smart maintainer, this doesn't apply, it will automatically go into float mode (see "further reading") for whatever it's hooked up to.
- Connect the battery. The charge will begin automatically. Just leave it that way.
On the subject of SoC
Battery state-of-charge can be estimated by measuring the terminal voltage, but only at room temperature, and only if the battery has been sitting idle for 15 minutes or more! Recent charging or discharging activity will throw the numbers way off. Slight chemical differences between flooded and VRLA/AGM mean you need to know the type to use this table.
| State of Charge | Sealed or Flooded Lead Acid | Gel battery | AGM battery |
|---|---|---|---|
| 100% | 12.70+ | 12.85+ | 12.80+ |
| 75% | 12.40 | 12.65 | 12.60 |
| 50% | 12.20 | 12.35 | 12.30 |
| 25% | 12.00 | 12.00 | 12.00 |
| 0% | 11.80 | 11.80 | 11.80 |
| Table swiped from http://www.energymatters.com.au/renewable-energy/batteries/battery-voltage-discharge.php | |||
Further Reading
The best resource out there is Battery University, a website which sprung out of Isidor Buchmann's seminal book "Batteries in a Portable World". It's a bit heavy on the Cadex product promotion, but their products really are cool, and the info really is good. (Incidentally, if you ever see a Cadex C8000 for cheap, well, you know what to do!)


