Walter's CNC Plasma Cutter
| This page contains historical information. It is provided for reference but does not reflect current information or policy. |
This page has been removed from search engines' indexes.
| Walter's CNC Plasma Cutter | |
|---|---|

| |
| Name | Plasma Cutter |
| Zone | CNC Shop
|
| Owner | Walter Fruge |
| Make Model | |
| Part Number | |
| Date Acquired | |
| Date Departed | NO DATE DEPARTED |
| Storage Location | To the left of the welding table. |
| Authorization Required | No |
| Status | Departed |
| Value |
|
| Documentation | Link(s) to on-line documentation |
| Other References | Inkscape (with Gcodetools extension version 0.17 installed) is the primary software tool suggested to convert artwork into G-Codes. The G-Codes (a simple text file) is then loaded into LinuxCNC which controls the machine. |
Intro
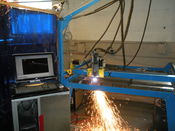
4' x 4' CNC Plasma Cutter (able to cut up to 1/2" steel / aluminum / copper / ...)
Rules
Must be on the list of operators to actually run the machine, but anyone can request a part to be cut. This will be flushed out better once the tool chain is set up.
Instructions
You can write the instructions here. Or maybe add a link to another page or the user's manual.
Maintenance Info
Maintenance Info is kept on this page:
FAQ
A list of commonly asked questions
- What are the Consumables for the machine?
- Torch Tips. To-Do: Need ordering and pricing info.
- Steel Support Mesh. Over time the steel support mesh gets consumed as the torch makes cuts. A new set of support steel can be fabricated on the Plasma Cutter - which is just cool.
- Can the Plasma Cutter be used as a pen plotter?
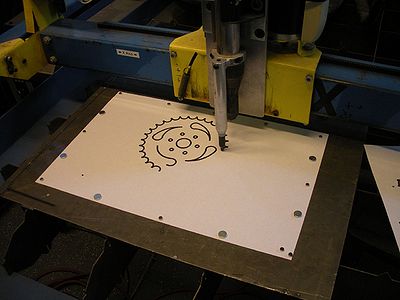
- Yes, there is an attachment that allows for a spring mounted marker to be used.
- Is it hard to convert the machine over to using the pen plotter option?
- No, two hex-head screws clamp the pen attachment onto the torch head. Simply turn off the power switch on the plasma control panel and your good to go. Oh, and don't forget to set the pen height using "touch off" inside LinuxCNC. Typically, the pen height, when the pen is down, is set to zero. Then, a positive 1" height is set as the "safe height".
- How can I compensate for the torch kerf?
- First, given a path in Inkscape that you wish to offset, make a copy using control-c / control-v. To help track the copy, change the color of the copy to red by pressing shift and click on the red color patch along the bottom of the screen. Next, align the copy exactly on top of the original. Now, with the copy selected, press control-j to turn on "Dynamic-Offset". The command is also under the "Path" menu option. Lastly, with the copy still selected, press shift-control-x to bring up the XML editor. Look for and click on "inkscape:radius" attribute. Change the value to offset * 90. As an example, a 0.125" offset would be set as (0.125 * 90), or 11.25. Note, Inkscape uses 90dpi for internal units. The copied path should now be exactly 1/8" offset from the original. The offset can also be a negative value to have the new path inset. Once the offset is set correctly, convert the "Dynamic Offset" back to a standard path by pressing shift-control-c (or menu option Path / Object-to-Path).
ToDo
In the final stages of being set up. Tool chain still needs to be defined.
