Classroom Remodeling
This is for collecting and updating the latest conclusions from the #classroom-planning channel on the Slack messaging app that i3Detroit uses.
Contents
Project Management
- Zone Coordinator – Matt Arnold - as of 1/4, resumption of occupancy is roughly estimated for February 11 of 2016.
- Structural - Greg, Konrad - nearly done as of 11/20/15, a few minor things left. Now- Terry W - Done.
- Rough Electrical - Evan - after finishing Paint, ETA 1/10
- Drywall – BEGIN 1/11 - Glen Moore, Terry Wynn. - after finishing Rough Electrical, allow 1 to 2 weeks
- Trim Moldings etc - Terry W - after finishing Drywall, allow 1 to 2 weeks
- Paint - Terry W - after finishing Trim, allow 1 to 2 weeks
- Flooring - Corey and Terry W - after finishing Paint, allow 1 to 2 weeks
- Ceiling - Terry W - after finishing Flooring, allow 1 to 2 weeks
- furnishings – Charlie
- Construction Documents
Dimensions
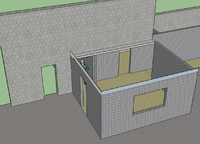
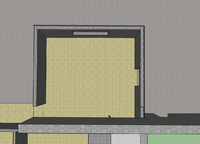
Main floor: 15' 11" x 15' 4" The column falls within this area.
New ceiling height: 8' 5 .25"
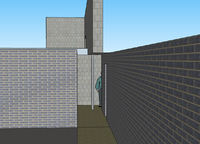
Hall from the outside door to the classroom: 4' 6" x 9'4"
Images
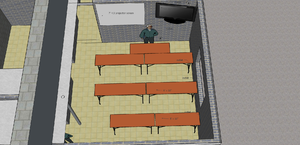
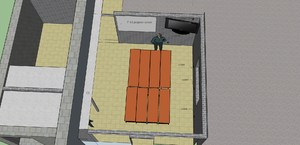
Images made by Matt Switlik in Sketchup:
Section 1: Electrical.
Electrical comes first in this document, because it needs to be finished while the ceiling is open, before the sheet-rock goes up.
Investigate the mysterious conduit and wiring dangling out of the rectangular cutout next to the iris door.
Add a few outlets around the perimeter, especially the north wall at table height (for workshops).
Run two switches, and two power feeds through every light fixture in the ceiling. Any given light can be wired to either feed by simply killing the breakers and opening the fixture to move a wire-nut.
Mount a new wiring box near the glass door, to aid future wiring of an access-control system for that door, and for sign lighting.
Run "smurf-tube" (Carlon Blue ENT flexible conduit) to plumb a low-voltage cable-path between the glass door's wiring box and the backboard, so we can easily pull and change wiring later as needed. "Low-voltage" is intended to include network drops.
Restore functionality to whatever craftroom or front-hallway circuits get interrupted by the work.
For whatever lighting we put in, the "end-user" goal will be:
- Abundant (in magnitude)
- Abundant (in coming from multiple directions)
- A comfortable color, not harsh (soft diffuse white light)
- A color that preserves accurate perception of the color of craft materials
Put back the exit light which, according to Greg Smith, is now stored in the electronics overflow next to the stairs.
Section 2: Furniture.
Seven folding "Seminar"-style tables measuring 18 inches by five feet. Recessed leg design for bruised knees. Blow-molded plastic top.
Affix a power strip to each.
Build a table cover out of masonite with a lip around it. Cut it so that when a multiple of the classroom tables are pushed flush together, the lip fits around them. This surface covers the seam between tables and protects crafts from dirt on the table surface beneath. Prop this surface vertically against the wall when not used. It will be held flush to the wall with a strap, or hung from hardware affixed to the wall. It will be covered by a drop cloth marked "For Clean Work Only". The south wall between the hallway and craft-room door might be best for this.
Put the coat rack back where it was.
Section 3: Walls and A-V.
Cover the west wall with whiteboard panels.
Replace the paneling on the east wall with something acoustically-dampening. Eliminate the rectangular hole.
We want to get a very large flat-screen TV and mount it at the top of the northwest corner of the room. It should be on a jointed arm so it can go flat against the north wall or west wall.
No need to install speakers in or on the walls.
A projector mount and a projector screen are optional "nice-to-have" items.
Section 4: Soundproofing.
Pull up the boards on the roof above the classroom ceiling, and fill it with flame-retardant Rockwool provided by Matt Switlik.
Drywall over the window on the north wall.
Keep all certificates for soundproofing materials to show to the inspector.
Install a heavier door with a floor sweep under it and a proper closer.
Section 5: Flooring.
Pull up all the flooring tiles and replace all of them with new tiles.
The walkway tiles should be in a different color that does not reveal scuff marks as well.
